This user has no status.
This user has no status.


Well yes, but if I have to break out the glue anyway, might as well put another layer on the blade and the rubber and just glue normally. The idea is to not mess with liquid glue at all. Or that’s my motivation at least…Липкая плёнка ультратонкая
XVT Glue Sheet, adhesive removable formula. Developed purposely for OX rubbers.
REMOVING GLUE SHEETS
Tip 1 (advanced method as adopted by Chinese locals).
-- You can brush 1 thin layer of non-orangic glue on blades and rubber sponges before using the adhesive glue paper, so when you want to peel off the rubber sheet, the paper glue sheet residue will not damage the blades and rubbers.
______________
Be happy all
Okay, sorry, but I have to ask: Why are you not going the usual glue sheet way?@Arkady I have used it (see again the previous photos!) and am going to exclusively use it from this point on. Like you, i have tested all TT brand glue sheets (Donic Nittaku Victas Gewo Tibhar etc AliX etc) and manufacturers' catalog samples (X-Film Germany, Neschen Germany, Aslan Germany); they are easy to work with but do NOT stick well to sponges. For some players, it may be "well", for me, it's not "well enough"! They all stick well to bare rubber and blade, but not to sponges. That's because sponges are porous, so there's little surface where the gluesheet can actually stick to. Liquid glues penetrate into the pores, and that makes all the difference.
Funnily, simple cheap carpet-tape has the best adhesion to sponges (similar to a proper monstermount install!) but there must have been several(!) reasons which i caht remember why i hard discarded it as viable option for our purpose. One reason could have been: carpet-tape is "thick", and with its thickness comes its effect on performance etc. For sheer adhesion to sponges though, carpet-tape remains your no.1 reference. No TT brand glue sheet comes even close to the adhesive power of carpet tape.
No need to worry, "monster strong" is just a marketing term. The glue is gooey hence harmless. Ofc it adheres better to the blade (than to the sponge) but trust me it's easy and straight-forward to remove from it, e.g. by using a Scotch tape to pluck off the residues. There is no way of harming the blade because the glue is so gooey!
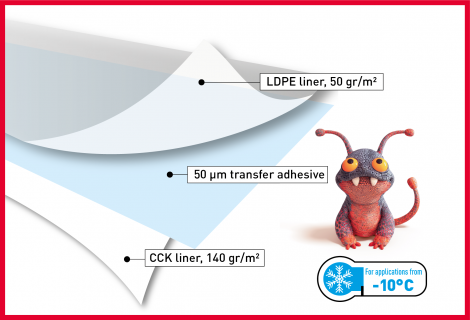
A gluesheet is a solid semi-transparent plastic sheet (backing foil), on either side of which the manufacturer has deposited a thin invisible layer (coating) of an adhesive, i.e. some glue. The two glue films doht flow anywhere, so they're not liquids. You have understood correctly, the monstermount does not have a backing foil; the product is just a thin layer of solid glue. For convenient handling and installation purposes, it is sold in sandwiched form, between 2 backing peel-off papers:
gpt likes it too:

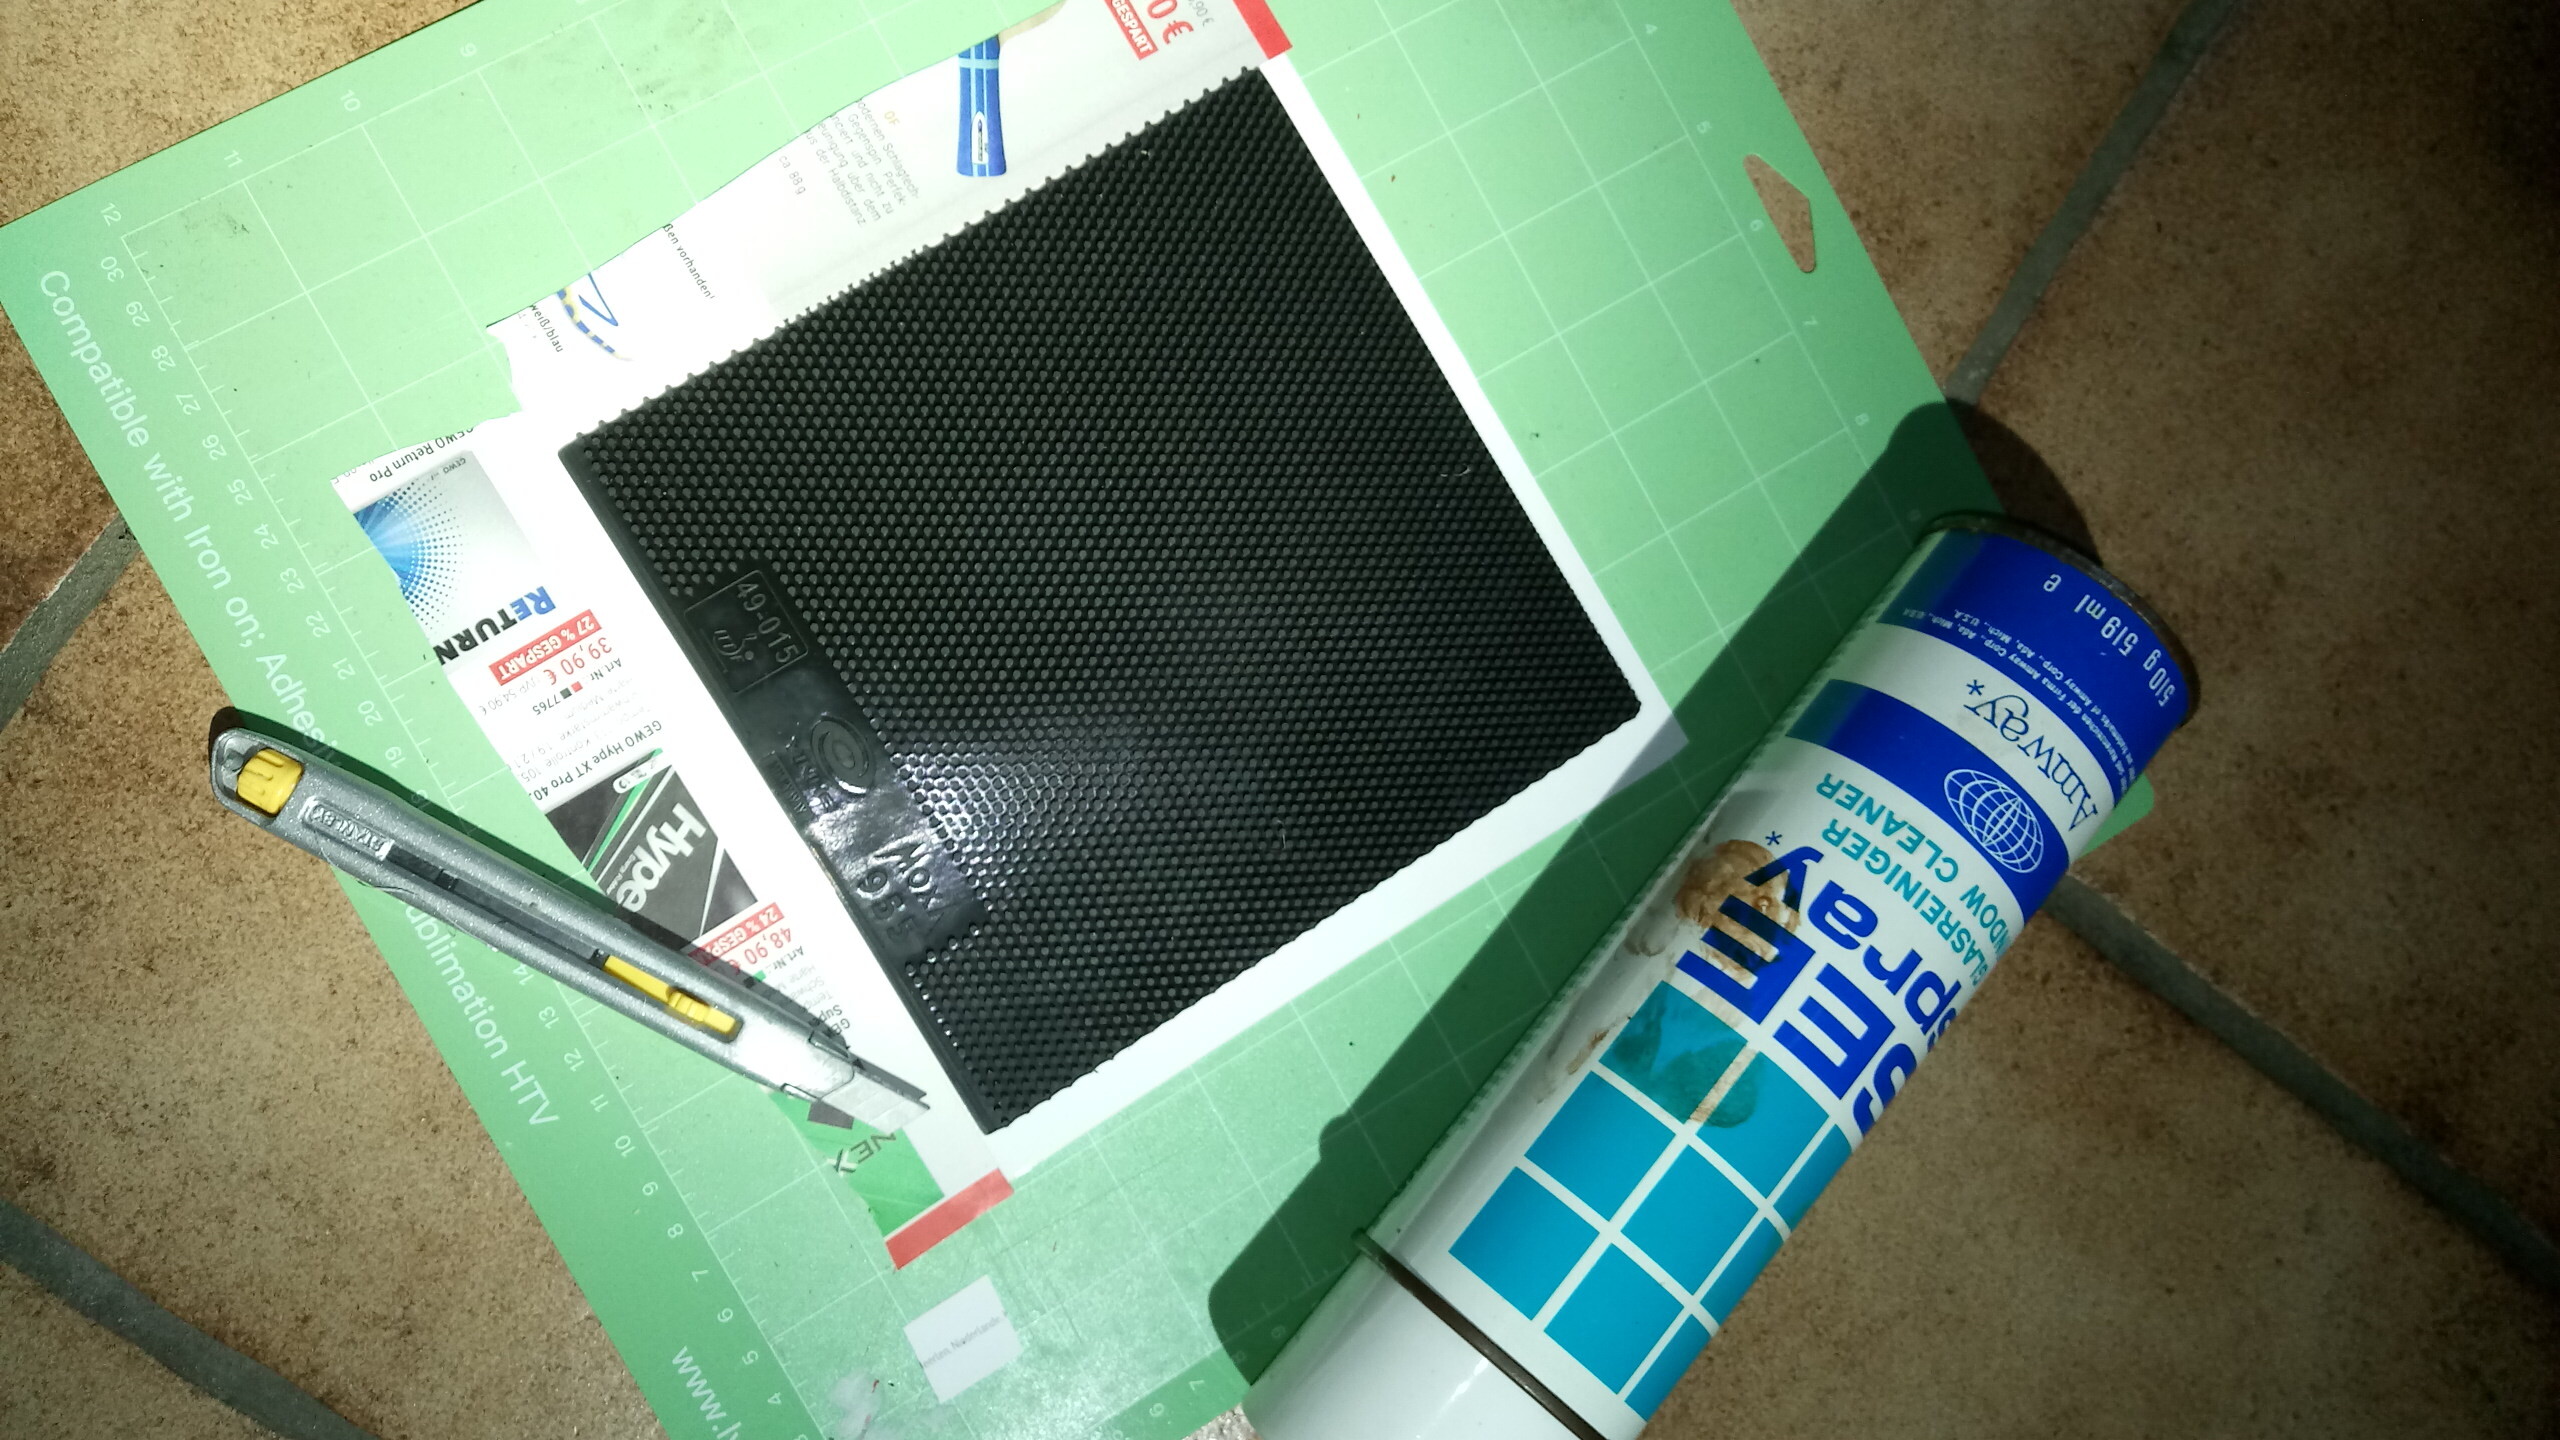
So what about my white label paper in the photos?
It might be an unnecessary step but it's clever anyway: before i cut the installed rubber to size, i cover the sticky sponge excess with paper (or label paper), so that the cutting process stays clean and non-messy. Otherwise the glue film could wrap around my knife blade, or the tearing of the film could become unclean.
Other than that, the installation procedure is straight-forward:
NOTE: Once the installed sponge has been lift off its glue film side (a glue film has 2 sides: one interfacing with the sponge, and the other interfacing with the blade), that glue film side woht stick (anywhere near well enough) anymore to the naked sponge! It takes some force to separate sponge from glue after their initial bonding, which is why we want to keep this nice bonding intact/protected. The use of 10mm edge tape helps with that.
- have a rectangular monstermount "sheet" ready. obviously, its (WxL) dimension doesn't need to fit exactly the quadratic size of your new ootb rubber (sponge-side!). peel off liner1, then you're ready to install the "sticky sheet" onto the sponge! (sponge first, not blade first!! — doht ask me why just do it)
the LDPE liner seems to come off first, which is fine.- it is easy enough to install the sticky sheet onto the sponge, without trapping air bubbles. once it is installed, i compress the rubber-sheet-assembly under a stack of books. didn't the datasheet say something about 'full adhesive power after 1 week'? oh well
- thx to the thickness of the CCK liner, the rubber becomes flat like a flat sheet (not dished/arched). when you think it's about time to proceed, peel off the liner2. now you have a "sticky sponge" in front of you, congrats! You also realize how thin (and even/regular) the glue film is, absolutely amazing.
but wait, be very careful when peeling off the liner2 (because you doht want to tear/ruin the glue film). also, peel off only a small area of maybe 1cm length (10mm x 170mm) at first, from the bottom edge.- as with latex-based glues, you have 1 attempt only: carefully align the rubber with respect to your blade, before you lower the bottom edge ("touch-down!"), making initial contact with the blade. try your best to not leave a gap between the 2 edges (handle vs. rubber line). hold still, get your roller.
- you really need a roller (a cylindrical object). now slowly roll the rubber onto the blade, with very little pressure. uncover more and more of the sticky sponge by slowly peeling off liner2, while you're rolling slowly, at the same time. the challenge is to not trap any air bubble! once done, you'll be amazed about the perfectly flat result. now it's time to cut the rubber to size.
- before i cut the installed rubber to size, i cover the sticky sponge excess with paper (or label paper), so that the cutting process stays clean and non-messy. Otherwise the glue film could wrap around my knife blade, or the tearing of the film could become unclean.
- for cutting, i use a 9mm-segmented box cutter (e.g. my STANLEY® Cutter Interlock 9mm).
- now it's time to install the 2nd rubber and cut to size (go back to step 3.)
- as a final step, i absolutely recommend applying 10mm edge tape to protect the sponge edges from coming off of the blade edges (thru pong accidents during a rally).
(...)
As a non-EJ, I am not a fan of recycling (=reusing) used rubbers or testing multiple blades and rubbers, but obviously EJ's would profit from this glueing method too, since it's the cleanest, neatest, hassle-free, time-insensitive method, always giving perfect results and resetting blades andrubberssponges to Like New condition with ease.
Also the most light-weight method.
Typically, the monstermount product is sold by the meter (or in a 25m bulk roll lol) at 123cm width at reasonable pricing. Ofc i know where to buy, in Germany.
So I continued the conversation a bit and it basically comes down to this:
I found the suggestions of chat gpt about possible gluing solutions, really interesting!
Many things can go wrong in using such pioneering materials. Safety first, my dear. 🥰I found the suggestions of chat gpt about possible gluing solutions, really interesting!
I think I will definitely try a non permanent spray glue for paper crafts and maybe a more permanent one like 3M™ Super 77™ Multipurpose Spray Adhesive.
Spray glue will definitely be much easier to use, than the hassle of spreading water glue with sponges.
You will have the hassle of taping / covering parts of the racket you don’t want sprayed, thoughI found the suggestions of chat gpt about possible gluing solutions, really interesting!
I think I will definitely try a non permanent spray glue for paper crafts and maybe a more permanent one like 3M™ Super 77™ Multipurpose Spray Adhesive.
Spray glue will definitely be much easier to use, than the hassle of spreading water glue with sponges.
Yes I know, but it's a very small sacrifice compared to all the hassles of water glue.You will have the hassle of taping / covering parts of the racket you don’t want sprayed, though
It hasnt for me so far.Not sure if localized heat is going to warp the blade...
Let us know how it goes... The last crafts glue I tried dried up flexible... But only in the sense that you can bend it and it stays in that shape. Not elastic at all.Yes I know, but it's a very small sacrifice compared to all the hassles of water glue.
I tried a non-permanent spray glue for stationery, with an old blade that I'm no longer using and a pair of old rubbers: I sprayed two thin layers on the rubber and one on the blade.Let us know how it goes... The last crafts glue I tried dried up flexible... But only in the sense that you can bend it and it stays in that shape. Not elastic at all.
It was a nightmare to remove, from a lacquered blade.
gpt likes it too:
So what about my white label paper in the photos?
It might be an unnecessary step but it's clever anyway: before i cut the installed rubber to size, i cover the sticky sponge excess with paper (or label paper), so that the cutting process stays clean and non-messy. Otherwise the glue film could wrap around my knife blade, or the tearing of the film could become unclean.
Other than that, the installation procedure is straight-forward:
- have a rectangular monstermount "sheet" ready. obviously, its (WxL) dimension doesn't need to fit exactly the quadratic size of your new ootb rubber (sponge-side!). peel off liner1, then you're ready to install the "sticky sheet" onto the sponge! (sponge first, not blade first!! — doht ask me why just do it)
the LDPE liner seems to come off first, which is fine.- it is easy enough to install the sticky sheet onto the sponge, without trapping air bubbles. once it is installed, i compress the rubber-sheet-assembly under a stack of books. didn't the datasheet say something about 'full adhesive power after 1 week'? oh well
- thx to the thickness of the CCK liner, the rubber becomes flat like a flat sheet (not dished/arched). when you think it's about time to proceed, peel off the liner2. now you have a "sticky sponge" in front of you, congrats! You also realize how thin (and even/regular) the glue film is, absolutely amazing.
but wait, be very careful when peeling off the liner2 (because you doht want to tear/ruin the glue film). also, peel off only a small area of maybe 1cm length (10mm x 170mm) at first, from the bottom edge.- as with latex-based glues, you have 1 attempt only: carefully align the rubber with respect to your blade, before you lower the bottom edge ("touch-down!"), making initial contact with the blade. try your best to not leave a gap between the 2 edges (handle vs. rubber line). hold still, get your roller.
- you really need a roller (a cylindrical object). now slowly roll the rubber onto the blade, with very little pressure. uncover more and more of the sticky sponge by slowly peeling off liner2, while you're rolling slowly, at the same time. the challenge is to not trap any air bubble! once done, you'll be amazed about the perfectly flat result. now it's time to cut the rubber to size.
- before i cut the installed rubber to size, i cover the sticky sponge excess with paper (or label paper), so that the cutting process stays clean and non-messy. Otherwise the glue film could wrap around my knife blade, or the tearing of the film could become unclean.
- for cutting, i use a 9mm-segmented box cutter (e.g. my STANLEY® Cutter Interlock 9mm).
- now it's time to install the 2nd rubber and cut to size (go back to step 3.)
- as a final step, i absolutely recommend applying 10mm edge tape to protect the sponge edges from coming off of the blade edges (thru pong accidents during a rally).