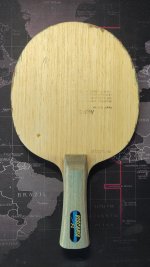
Sanding down Carbon blade

This user has no status.
Well-Known Member
May 2011
1,213
1,314
3,207
Hello!
I got a new Blade (Harimoto IF alc in cs) and I have´nt glued rubbers on it, because I have to sand down the wings of it.
So my question is how can i sand it down so its comfortable and can it destroy the Carbon layer on the whole Blade if I sand it down at the wings?
The carbon layer is very thin, just sand it regularly and you'll be fine. I've had a lot of carbon blades and I've sanded about half of them both the shoulder and the head. I sanded both the shoulder of Cpen blades and to make the head smaller for Cpen and SH blades, so quite a bit of blade removed. Never had an issue. If you're sanding a lot, use low grit like 80 grit to start, then ~300 grit to get to your desired shape, and 1000 grit to make it smooth.

Since you're just doing the wings you can probably just start with 300 grit. I sanded off a lot of the blade and 80 grit was magical compared to 100 grit.
 
says Spin, Spin, more spin :)
Member
Jul 2022
57
24
106
You can wrap the sandpaper to a bottle of deodorant or smthn else then sand the blade, it will be more even and well looking.
 
  • Like
Reactions: PaddyPolar
This user has no status.
Member
Dec 2023
11
1
30
18
The carbon layer is very thin, just sand it regularly and you'll be fine. I've had a lot of carbon blades and I've sanded about half of them both the shoulder and the head. I sanded both the shoulder of Cpen blades and to make the head smaller for Cpen and SH blades, so quite a bit of blade removed. Never had an issue. If you're sanding a lot, use low grit like 80 grit to start, then ~300 grit to get to your desired shape, and 1000 grit to make it smooth.

Since you're just doing the wings you can probably just start with 300 grit. I sanded off a lot of the blade and 80 grit was magical compared to 100 grit.
Thank you for the detailed instructions. I will try it this way.
You can wrap the sandpaper to a bottle of deodorant or smthn else then sand the blade, it will be more even and well looking.
But is it that effective then? From the shape it makes sense, but how would I do effectively? Thanks!
Don't worry about it, just treat it like normal all wood blade, use the sandpaper you have
Okay thanks a lot!


I did it once with an all wood blade and it got very dirty where I sanded it. Like greyish and also there were some small holes in there, which is. At least not that pleasing. Do you guys have experience with that? And how can I avoid it?
Also would you guys do it on both sides so it looks equally or is that not important. And before glueing or after glueing? I am thinking it would be smart to first sand it down and then try it out glued and sand down the fine adjustments after playing over and over again. Is that smart?
 
says Serve, top, edge. Repeat.
Active Member
May 2020
908
427
1,559
Read 1 reviews
Thank you for the detailed instructions. I will try it this way.

But is it that effective then? From the shape it makes sense, but how would I do effectively? Thanks!

Okay thanks a lot!


I did it once with an all wood blade and it got very dirty where I sanded it. Like greyish and also there were some small holes in there, which is. At least not that pleasing. Do you guys have experience with that? And how can I avoid it?
Also would you guys do it on both sides so it looks equally or is that not important. And before glueing or after glueing? I am thinking it would be smart to first sand it down and then try it out glued and sand down the fine adjustments after playing over and over again. Is that smart?
Sand it only from the side you'll use it for forehand.

These little holes are the wood grain, if that's what you mean.

- Wrap the sandpaper around a cylinder, like a roller for rubber gluing. Start sanding down at a 45 degree angle relative the the surface of the racket face, and also at a 45 degree angle relative to the handle, like in the first photo.

- Start sanding very lightly and after every few storkes, always test it to see if the sanding is enough. It's easier removing material rather than adding back, that's why mine has this weird coloured thing on the right wing, I sanded too much and had to add material back in order to get it down to my size again.

- Start with a 100 for the main shape, add the details and slowly bring it to form with a 250, then to make it smooth, use a 400.

Generally the wing of your index finger will need more sanding than the thumb.

Check this video:

Here's mine for reference.

IMG_20240302_174113.jpg
IMG_20240302_173812.jpg
IMG_20240302_173920.jpg
IMG_20240302_173952.jpg
 
This user has no status.
Member
Dec 2023
11
1
30
18
These little holes are the wood grain, if that's what you mean.
So they are´nt a problem right?
- Wrap the sandpaper around a cylinder, like a roller for rubber gluing. Start sanding down at a 45 degree angle relative the the surface of the racket face, and also at a 45 degree angle relative to the handle, like in the first photo.

- Start sanding very lightly and after every few storkes, always test it to see if the sanding is enough. It's easier removing material rather than adding back, that's why mine has this weird coloured thing on the right wing, I sanded too much and had to add material back in order to get it down to my size again.

- Start with a 100 for the main shape, add the details and slowly bring it to form with a 250, then to make it smooth, use a 400.

Generally the wing of your index finger will need more sanding than the thumb.

Check tView attachment 28627
Okay that´s quite helpful I will try it, thank you. But how you got it so clean? On my last blade I got a lot of grey dust out of it and it went in my blade. I think it does´nt affect the blade, but it does´nt look so nice. Have you got the same issue and how did you avoid it on your blade right now? Because It looks like it does´nt have it.
 
says Serve, top, edge. Repeat.
Active Member
May 2020
908
427
1,559
Read 1 reviews
So they are´nt a problem right?

Okay that´s quite helpful I will try it, thank you. But how you got it so clean? On my last blade I got a lot of grey dust out of it and it went in my blade. I think it does´nt affect the blade, but it does´nt look so nice. Have you got the same issue and how did you avoid it on your blade right now? Because It looks like it does´nt have it.
Yeah the holes are part of the wood.

I don't know what you mean, I always sand in the same direction, downwards with rough sandpaper and very little pressure. Then I got the finer paper and I could sand it down to be smooth and even.

Always do the sanding when the racket is dry and with no sweat. I'm guessing that the grey dust is because of carbon, and that could've happened if it got wet by sweat or humidity. But I don't get it, it shouldn't stick either way. After every few strokes blow on it to get rid of the dust on the wood and you should be fine.

My yeo is all wood, so that's probably why I don't have the gray dust.
 
Last edited:
Top