
This user has no status.
This user has no status.
Member


I thought I'd make a separate topic for this so it's easier to find for those who may be interested in trying this or just to compare methods.
Firstly, there are loads of information on the internet about using hide glue. Here are a few links that I found useful:
https://www.youtube.com/watch?v=o8Ubb659iXc
https://www.youtube.com/watch?v=Raq3pbGmmOg
If you are going to try using hide glue there are a few tips I would suggest:
1) Get the right equipment - this is essential. It needs to be heated in a water bath and the margins for error are small.
2) Buy high quality glue - look for what luthiers use. It comes in different strengths so go for the higher one.
3) As always, practice a few times first.
4) You need time and patience.
5) By the way it smells so do it outside. Personally I don't mind the smell but my kids always moan about it!
Step 1:
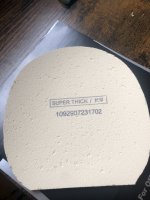
Here are the parts for the blade which will be a kiri - mahogany - birch composition with mahogany and maple burr handle.

Step 2: Prepare your glue. You need to soak the pearls in water for at least 3 hours, I do it the day before. I put them in an old jam jar. Add just enough water to cover the pearls. After a few hours the water is soaked up and the glue will look like fish eggs.

Step 3 - Cook the glue. This is where you need a water bath, I am lucky to have an old double boiler which is designed for this purpose. You can pick these up on auction sites or I am sure you could create something similar with an old pan of water with the jar suspended off the bottom of the pan. You can also buy electric versions too.
Here is my set up. I use an electric hob (cost about £15) and a thermometer which is crucial.

This is where it can go wrong! You need to cook the glue at around 155 degrees fahrenheit (approx 70 degrees C) for at least 30 mins. If you don't get it hot enough or it gets too hot it will affect it's adherence. You need to cook it until it's starts to foam or bubble, sometimes a skin forms. Just stir all this back in. You also need to get the consistency right too, something similar to cream or paint. Too thin and you'll loose adherence and too thick and it's hard to spread. Add water or cook for longer to reduce- I have a water bottle on hand.
Step 3: Apply to your veneer. I've found that a small paint brush works best. Obviously make sure the coverage is even and complete.

Press as normal. Clean up is easy, you just need hot water, I tend to use the hot water in the outside boiler. When you get it right the bond is superb, strong and as you can see from the weight of the final blade one of the lightest glues. If you have any left it will keep in the fridge or outside for a few days. It does seem to get stronger when it's reheated. It can develop mould, in which case it needs to be discarded.
Here's the final blade, 6.1mm; 82g flared handle. Off minus to off - I'll find out when I stick some rubbers on and give it a go. Happy to answer any questions and hopefully this is of some use.

Firstly, there are loads of information on the internet about using hide glue. Here are a few links that I found useful:
https://www.youtube.com/watch?v=o8Ubb659iXc
https://www.youtube.com/watch?v=Raq3pbGmmOg
If you are going to try using hide glue there are a few tips I would suggest:
1) Get the right equipment - this is essential. It needs to be heated in a water bath and the margins for error are small.
2) Buy high quality glue - look for what luthiers use. It comes in different strengths so go for the higher one.
3) As always, practice a few times first.
4) You need time and patience.
5) By the way it smells so do it outside. Personally I don't mind the smell but my kids always moan about it!
Step 1:
Here are the parts for the blade which will be a kiri - mahogany - birch composition with mahogany and maple burr handle.
Step 2: Prepare your glue. You need to soak the pearls in water for at least 3 hours, I do it the day before. I put them in an old jam jar. Add just enough water to cover the pearls. After a few hours the water is soaked up and the glue will look like fish eggs.
Step 3 - Cook the glue. This is where you need a water bath, I am lucky to have an old double boiler which is designed for this purpose. You can pick these up on auction sites or I am sure you could create something similar with an old pan of water with the jar suspended off the bottom of the pan. You can also buy electric versions too.
Here is my set up. I use an electric hob (cost about £15) and a thermometer which is crucial.
This is where it can go wrong! You need to cook the glue at around 155 degrees fahrenheit (approx 70 degrees C) for at least 30 mins. If you don't get it hot enough or it gets too hot it will affect it's adherence. You need to cook it until it's starts to foam or bubble, sometimes a skin forms. Just stir all this back in. You also need to get the consistency right too, something similar to cream or paint. Too thin and you'll loose adherence and too thick and it's hard to spread. Add water or cook for longer to reduce- I have a water bottle on hand.
Step 3: Apply to your veneer. I've found that a small paint brush works best. Obviously make sure the coverage is even and complete.
Press as normal. Clean up is easy, you just need hot water, I tend to use the hot water in the outside boiler. When you get it right the bond is superb, strong and as you can see from the weight of the final blade one of the lightest glues. If you have any left it will keep in the fridge or outside for a few days. It does seem to get stronger when it's reheated. It can develop mould, in which case it needs to be discarded.
Here's the final blade, 6.1mm; 82g flared handle. Off minus to off - I'll find out when I stick some rubbers on and give it a go. Happy to answer any questions and hopefully this is of some use.